Sunday, May 19, 2024

New Rig #5 Rigging and Top of the Mast

This is that last in a series of posts on the new rig that I built for Little Cat in the Fall of 2019. 

The forestay and shrouds were made up from 3/16 7x7 316 stainless wire. This is one size over the 5/32 size specified in the Wharram plans. I calculated the length of the shrouds on paper, but left the forestay long so that I could raise the mast and cut it exactly to length on the boat. 

At the top of the of the mast, the Wharram design uses a loop that fits around the mast in the traditional fashion. At the bridle and chain plates, the forestay and shrouds end in heart-eye thimbles and lashings (see the links to previous posts).

First swage being formed. Second swage ready to go next. Polypropylene tube in place before forming the swage.

The mast loops and heart-eye thimbles were formed using nicopress swages. I got a used nicopress tool off Craigslist and did all of the swages up to 1/4" size in my bench vice as shown. I had to remember to put polypropylene tube and heat shrink tube onto the wire before forming the swage. The poly tube is to protect the wire and aluminum mast from wear, and the heat shrink is shrunk over each swage to make a neater finish that won't catch on lines.

Finished double swage with heat shrink ready to go.

The swages were doubled up for peace of mind. Only one is necessary, and two can be a problem if they are formed without a slight gap between them, but I took care to leave a fraction of a mm between each swage so that they did not bind against each other.

Finished double swage with heat shrink.

The Wharram plans specify a wooden cleat on the mast to hold the stay loops in place. I couldn't find a suitable stainless or aluminum substitute so used two heavy duty eye straps screwed to the mast with tapped threads. This set up has the added advantage that the stays are not going to fall off the mast when moving it about or lifting it into position.

Looking from top to bottom front of mast, forestay in front. Upper (near) slot is for spinnaker halyard sheave, lower slot is for jib halyard.

I opted for internal halyards and used Allen HA6 sheave boxes. There are four sheaves at the top of the mast (throat, peak, jib and spinnaker) and four sheaves at the bottom of the mast exiting to horn cleats (see "New Rig #3").

Allen HA6 38mm Sheave, Plain Bearing, Aluminum Body, Sheave Box

I worried that the Allen sheave boxes might not be strong enough as they are designed for big dinghies, but they have been completely reliable and are vastly stronger than the small blocks specified in the Wharram plans. 

Side view. Forestay on top.

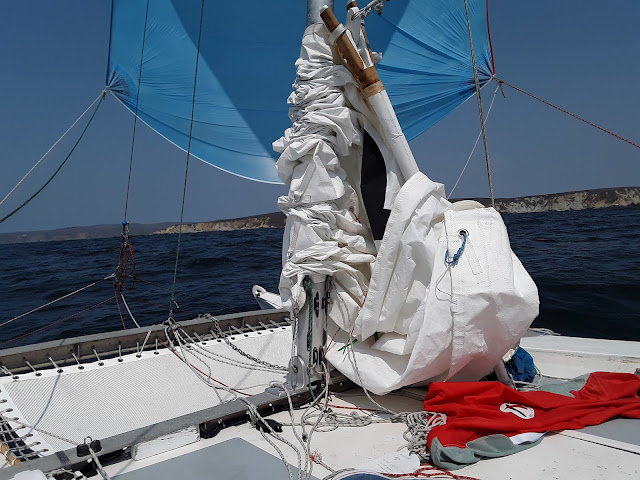
How has the rig worked out? The 4 feet of extra mast height allows lifting the mainsail so that there is 4 - 5 feet of clear space between the foot of the main and the deck. This greatly improves visibility and allows easy movement under the sail. It also allows the sail to be carried much higher up the mast in light air. The extra mast height also allows me to carry a very large spinnaker in light air. My big ass spinnaker will pull the boat at whatever the windspeed is: 5 knots of wind astern = 5 knots of boat speed. This is a huge asset on long downwind trips (see "Spinnaker Run to Tamales Bay"). 

The rig is bullet proof and gives me peace of mind on long trips in open water. I have several thousand miles on the rig at the time of posting - no problems except that the mast mounting pin has become seized in the mast base, and I need to undo the 8 mounting bolts to take the mast off, instead of just pulling the pin. I made the pin too tight a fit in the mast and didn't use enough anti-seize. It has no effect on the performance of the rig - just a little longer to remove the mast.

Tuesday, July 11, 2023

Petaluma River II

 I am way behind with my posts. This one is from Spring 2020 on my second overnight up the Petaluma river. On this trip I wanted to visit the old house ruins on Mud Slough by way of San Antonio Creek.

I didn't get to the Petaluma River until late in the day. Here heading up San Antonio Creek after turning off the Petaluma.


The sun was setting as I made progress up San Antonio Creek.


I kept going past the Land Fill which backs onto the creek, until reaching the turn off to Mud Slough. At 12 feet of beam, it turns out the Little Cat was too wide to make it far into Mud Slough. So I settled for anchoring as far up San Antonio Creek as I could go as evening arrived.


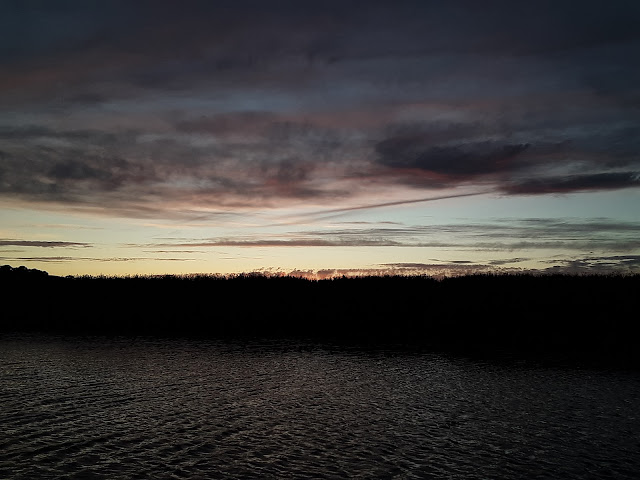
At dusk, I was treated to a spectacular light show.


I put up the boat tent, made scrambled eggs and tomatoes for dinner and settled in for the night.


I was up early next morning to enjoy the dawn.


There was a heavy dew all over the boat and tent, and a light fog on the river.


It wasn't long before the fog burnt off, and I had oatmeal for breakfast taking in the view.


I took my time getting ready and made the most of the beautiful morning light and surroundings.


I finally got organized, pulled up the anchor and started to make my way back down the creek towards the Petaluma River.


I decided to leave the boat tent up as it was so still and calm. All the way down San Antonio Creek there were ruins from the past - old building foundations, jetty's and pilings.


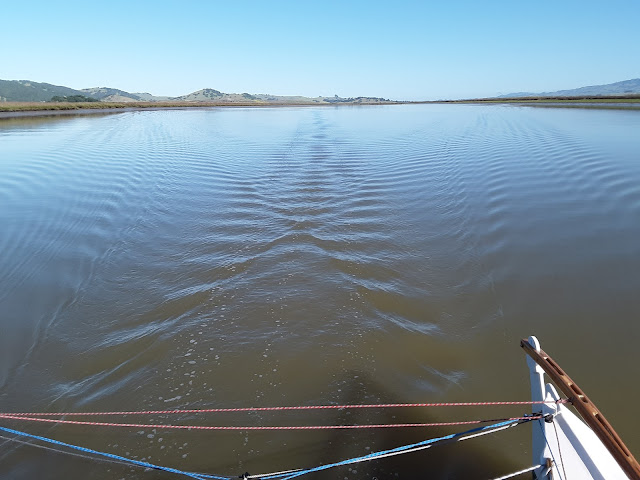
Back on the main Petaluma River, Little Cat left delicate tracks on the mirror smooth river.


It was still early in the morning when I exited under the Highway 37 bridge, riding out the last of the outgoing tide. There was still several hours of motoring in the calm conditions to make it back into The Bay.

Sunday, June 26, 2022

Tohatsu 6hp Outboard 350 Hour Service

It took 3 years to put an additional 225 hours on the Tohatsu since that last service (see previous post). In that time the motor has run flawlessly, always started and never let me down. It was running so well that I put off doing the scheduled services (as I'm sure most owners also do). But the hours were mounting up and I felt I could not put it off any longer. One problem that had developed was that there appeared to be wear in the mounting bracket such that the outboard could clunk slightly side to side on its mount. I did not like that at all and expected that I would need to replace the mounting bracket.


Parts all over the kitchen (of course)

I went through the awkward ritual of getting the motor off the boat and into the dinghy. It went better this time because I rigged a bridle of ropes to carry the outboard horizontally. Rather than having to manhandle the outboard vertically with its long 25" leg getting in the way, I could lift it in a horizontal orientation and lower it into the dinghy (no pics).

Carburetor

I tackled the carb first, pulling it apart and finding that it looked really clean. I attributed this to always draining the carb after use so that water accumulated in the gas cannot corrode the fuel bowl.


It does look very clean, but as I was to find out later, looks can be deceiving.

I removed the float and all of the jets and blew out the passageways with carb cleaner. I measured the float level and found it to be in spec, but decided to change it anyway as I had paid for an expensive carb-rebuild kit which included a new float and valve. I soon regretted this as the stainless pin that holds the float was stuck firmly. I had to drive it out using a very small punch and started to send it the wrong way, despite having a workshop manual to consult.


Float pin comes out to the right.

Anyway, I finally got it right and installed the new float and valve and reset the float height. Then the card was reassembled with a new o-ring for the fuel bowl. In hindsight it was not worth purchasing the pricey carb rebuild kit. The only item I really needed was the o-ring.

Fuel Pump

The carb had been cleaned once previously, but the fuel pump has never been off the motor. The manual said it needs to be cleaned at 300 hours, so clean it I did. The pump had been working fine and was very clean inside. The pump diaphragm was OK, but I would have been happier replacing it with a new one. I hadn't bought one because the genuine diaphragm is something like $40, while a whole new pump is $65. I think I will get a whole new pump as a spare in case of failure. Next I took out the wafer-thin valve elements (still in the pump body in the picture) and cleaned them. The flutter valve elements are very flimsy and fragile but I managed to get them apart and back together again. The only part that the workshop manual says has to be replaced is the o-ring that sits between the pump and the engine block. I had pre-ordered the o-ring and fitted it.


Diaphragm, valve element (in the pump) and valve cover.

Mounting Bracket

After dismantling the bracket and giving it a good clean, there was no sign of excessive wear. The sloppiness was just because it needed to be tightened a bit. Problem solved. I had wasted hours on the internet looking up the cost of a replacement bracket for nothing.

Water Pump

Next was the water pump which was way overdue for replacement. The bottom section came off easier this time than the last due to copious greasing of the bolts. Given that it had been running for 200+ hours the pump impeller still looked in good shape, but the base of the impeller housing was badly scoured, I'm guessing from mud getting sucked through the impeller. The water pump replacement kit is much better value than the carb kit and comes with everything you need include a new impeller housing, gaskets and new bolts. 

Worn water pump cover after 200 hours.

It is tricky lining up everything to refit the bottom section: the drive shaft, water pipe, gear shifter shaft and shift lock-out pin all need to find their home in the shaft housing. I found that having the housing to one side allows all four to snug home easily, but on the other side it is difficult. I can't now remember which was the easy side, but when you get it oriented the right way, the lock-out shaft in particular kind of falls into the right position.

New gasket and impeller.

Tappets/Cover

I then reset the tappets, which (again) only required minor adjustment. A corner of the tappet cover was very rusty, so sanded, primed and painted it. The only paint I had on hand was Rustoleum Brown Hammered Finish - not very pretty, but effective.

Tappet cover prepped for paint.

Hammer glaze?

Flush

The motor was then run up so that I could flush out the case with a water and vinegar mix. The motor started and ran but had a big miss off idle. I carried on and ran it in a vinegar bath for a while, before flushing with copious fresh water. I should have stopped right then and figured out why the motor was missing, but convinced myself that it was just clearing its throat after not running. I was in a hurry to get it done and back on the boat so that I could take the Little Helpers out to Angel Island the next day. Big mistake.

Note the new fuel filters. The large one is an add-on.

Reinstall and Run

We headed to the boat the next day, and Little Helper #1 waited while I fitted and restarted the motor - it would not start. I started to get breathless from pulling on the starter cord. It caught and started to run, but had  a massive flat spot off idle and would only run at high revs. Then I had to apologize to Little Helper #1 for using bad words. For the first time since I got the boat, we were prevented from going on a trip because of a mechanical problem.

A few days later, I tried to figure out what was up. At first I was convinced that I had damaged one of the delicate flutter valve elements in the fuel pump, but pulling the starter cord it was clear that fuel was flowing. Next I took the carb off and convinced myself that the fuel bowl screws were not tight - I refitted the fuel bowl cover and it made no difference. I took the carb off again and took it home for another clean.

This time I soaked the carb overnight in a container filled with carb cleaner (what I should have done first time around). When I removed the jets again I found the problem - a big lump of junk blocking the idle jet! So, when I cleaned it the first time I had just loosened the dirt inside so that it could move around and block the idle jet the first time I tried to run it. Lesson learned - spend time soaking the carb and getting it very clean.

As soon as I refitted the carb, the motor ran sweetly and has done so for quite a few hours already (this post is months behind the actual work). I'm looking forward to another couple of hundred hours of reliable running from the Tohatsu.

Saturday, January 8, 2022

New Rig #4 Sleeving the Mast Sections

The Tiki plans specify a 4"x 1/8" 316 aluminum tube for the mast section (or wood as per the original plans). The aluminum tubes come in 20' lengths so I had to sleeve together a 20' length plus the additional 5' that I wanted for my finished mast height. The standard mast height is around 21 ' but gives very little room to move around the deck when the mainsail is set - I have to crouch down low to get under the main when tacking. I wanted to add additional clearance under the main to allow easy movement and better visibility, and this produced a finished mast length of 25', so around 4' taller than a standard mast. Note that even the standard mast height of ~21' requires adding additional length to a 20' aluminum tube, and this is usually done with a short wooden section at the mast base.


Finished mast joint


I used the sleeve formula used by Kim on his Tiki 26 in LA, and posted on Wharram Builders and Friends (thanks Kim). The original came from Sailing Anarchy (see below). The sleeve is 5 tube diameters long, so 20" in this case. I used an additional section of the same mast tube to make the sleeve. This section was cut lengthwise (gingerly using a Skilsaw with an aluminum blade) to create a slot about one inch wide. This is so that the sleeve can be compressed to slide inside the mast sections.

One tube diameter each end (4") is cut into "teeth" so that there is no hard point transition from the sleeve edge to the mast section. Instead of using sharp angles as shown in the graphic, I cut mine into rounded shapes at the top and bottom of the "teeth" because I thought it would leave the sleeve stronger.

The sleeve was then compressed using hose clamps, and inserted into the mast sections using West gflex epoxy as a bonding agent (others recommend using 5200, but the gflex has worked out well). While the glue was setting, I drilled a pattern of holes and riveted the sleeve and mast sections together. I already can't remember what size stainless rivets I used, but it was either 3/16" or 1/4." The sleeved mast is rock solid and has been in use now for three years at the time of writing, including some long coastal trips and winds to 30 knots under full sail.

I don't usually add this disclaimer, but it should be self-evident that I am describing here what has worked for me, and I'm not suggesting that anyone should follow this design for their own use. 

Tuesday, December 7, 2021

Corporate Team Building Event on Angel Island

Three years ago some friends from work and I sailed to Angel Island for the original "Corporate Team Building Event on Angel Island" which included a walk to the summit of Mt Livermore (788 feet).

At the end of Summer, we set out again to replicate this amazing feat. We were braced for adventure, but winds were light and we had to motor all of the way to Ayala Cove.

Raghu fends off dehydration

From the Cove, we set out on our journey to the summit. The path was steep, however, and we changed out minds and walked around the island instead (about two hours). Next time we will summit twice to make up for it. Back at the cafe, we enjoyed a beer before heading back.

Data scans the horizon for marine hazards

On the voyage home, we had a short sail across Raccoon Straight before the wind died, leaving us to motor all of the way back. This was in contrast to our previous adventure when we had to heroically beat home against a stiff northerly under shortened sail, and all got very wet. This trip was dry all the way, leaving just enough energy for a well-deserved burger and beer.

Roger braves the elements

Thursday, October 7, 2021

Spinnaker Run To Tamales Bay

It was to be the last trip for the summer of 2021. I had three days and a forecast for a gentle southerly to blow us up the coast. Left at 3 AM to catch the outgoing tide, and was passing Pt Bonita at 5.00 AM, still in the dark. Nearly hit the Bonita Channel port (red) marker off Rodeo Beach - did not expect it to be unlit. By 7.00 AM we were passing the Duxbury Reef marker (Bolinas) in daylight, already crowded with fishing boats.

Outbound in red, 31 nautical mile spinnaker run in bold red, inbound in blue. 129 NM total.

As always, the ocean breeze finally filled in a couple of miles past Duxbury Reef. It was very light, however, barely five knots. Finally I could shut off the noisy outboard motor and launched the "big ass" spinnaker in a dead run towards Pt Reyes. This spinnaker is over-sized for the Tiki, and drags its foot in the water, unless there is enough breeze to fill and lift it clear (even though my rig is 4' taller than standard). There was just enough breeze to keep it out of the water, and it pulled the boat at around wind speed of 3 to 5 knots, and kept pulling it all day long.

Approaching the turn around Pt Reyes.

We gybed around Pt Reyes with the set to port and headed down the long West side of the peninsula towards Tamales Bay.

By the time we were off the Tamales Bay Point, we were back on a starboard set and only doused the spinnaker as we passed the channel entrance buoy. Thus ended the longest spin run on Little Cat so far of 31 very pleasant and relaxed nautical miles.

I fired up the outboard and headed across the bar into Tamales Bay. The breeze filled in again astern, so I hoisted the mainsail, and motor sailed down the bay.


Approaching Tamales Bay Pt

We motor-sailed against the outgoing tide, hugging the south west shore exploring all of the delightful bays and beaches. The first of the larger bays is White Gulch, but a north easterly breeze made it too windy and exposed to make a good anchorage for the night. After around 6 nautical miles, I dropped anchor at the aptly named No Name Beach (one bay south east of Tamales Beach with its camping ground), and set about putting up the boat tent and preparing  dinner. In a long and memorable day, Little Cat and I had covered 61 nautical miles in around 14 hours.


Marshall Beach Campers

The next morning I had a lazy breakfast and then set off to explore further into the bay. Marshall Beach was the next named cove heading south east up the bay and was occupied by a friendly party of paddle-in campers. On the far side of the same bay is Laird's Landing with a delightful little beach and small beach house in the trees. It was a very calm spot and would make a great overnight spot in the future.


Laird's Landing (note the little beach house in the trees)


Heading further down the bay, we passed Indian Beach and Heart's Desire and got as far as Shallow Beach before turning around. The environs of Shallow Beach are private homes, so I mistakenly thought that I had reached the extent of the park reserve, not knowing that it continued again beyond the private land. We headed back to Heart's Desire and anchored under the cliffs at the northwest end of the beach for a long lunch break.


Indian Beach

This is a really beautiful spot and is accessible by road, so there were a quite a few people at the beach. After lunch, we headed back up the bay, re-exploring all of the nooks and crannies of the west side. We crossed into the central channel that passes Hog Island and out towards Lawson's Landing looking for a good launch spot for an early start back in the morning. 


Lunch stop at the north western end of Heart's Desire 

I settled on Jack's Cove which is a magic little spot not to far from the Bay entrance. It is right next to the channel so made sure to put out plenty of scope on the anchor so as not to drag in the night. I had motored around all day with the tent still over the gaff, so it did not take long to get the boat ready for another night, and to cook up some lasagna on the stove.


Jack's Cove in the late afternoon on an overcast day

l was up at 3 AM and started to pack and make the boat ship shape for the 55 nautical mile passage back to San Francisco Bay and home. We set off at around 5.30 AM and were passing the Tomales Bay Channel/Entrance Buoy at 6 AM. I was hoping to sail back (obviously) and hate the sound of the outboard droning, but as we turn South and set a course for Pt Reyes, the wind was hard on the nose.


Sea Grass at Jack's Cove

If I had time to spare I would have been happy to tack to windward and spend a night at Drakes Bay to make a two-day passage. But alas I had commitments and had to be back home before nightfall. So we chugged to windward in a short and fairly unpleasant chop making around 5 knots. I had a fresh full tank of gas and decided to do a test to see how long the outboard run before the tank ran dry.


Camp Chaos

We rounded Pt Reyes at around 10 AM into a 1 knot tidal current. I had hoped that the wind might be more favorable after rounding the Pt, but the wind swung back right on the nose (of course). So, Little Cat motored on for hour after hour, passing Duxbury Reef again at 2 PM. Finally, as we approached Pt Bonita, the wind filled in astern and I hoisted the white sails to run through the Golden Gate. As is typical for San Francisco Bay the wind was patchy inside the Bay and we encountered 30+ knot gusts heading past the Paradise Cove area in the late afternoon. Little Cat and I arrived home in good time and logged 129 nautical miles in three days. The run up to Tomales Bay had been a light-wind spinnaker delight, while the trip back was a noisy motoring slog and not so much fun. On my next trip to the Bodega Bay area, I plan to have more time to enjoy the trip and avoid having to rush back on a tight time schedule.

Pt Reyes looking grumpy in the overcast


Thursday, March 11, 2021

Fine day on Fourfathom Bank

The entrance to the Golden Gate Channel is guarded by an area of shallow water called The Fourfathom Bank. It is a sand/mud bank built up over millennia by the tidal outflow from The Bay and the rivers draining from the Sierra. The Bank is notorious because of the lumpy seas that it produces, even in mild conditions. When there is a big swell running, The Bank becomes a spectacle with 20 plus foot waves breaking for miles out to sea. Many sailors have come to grief on and around the Fourfathom Bank.


The depths in the middle of the bank are less than 30 feet even four and five miles offshore. A channel passes through the semicircle of shallow water guarding the Golden Gate allowing commercial shipping and the rest of us to pass through.


On a fine day in February, I headed out planning to meet my family at Bolinas. As often happens, I left a little late so abandoned the original plan and sailed an erratic path out and over the Fourfathom Bank. The wind was blowing barely 10 knots and the ocean swell was small. Nonetheless the waves over the bank were steeper and closer together than one would expect given the benign conditions (see video above). You can imagine what it is like out here when things are really pumping!

Did you see the porpoise? I have been trying to photograph a Harbor Porpoise for years, but their fast movements defy getting a good shot. By coincidence I caught a porpoise surfing behind the boat in the video - if you missed it see the edited version below (look at the top left of the video).